Wednesday, March 14, 2012

My Brainiac Piñata


Did I ever show you folks my Brainiac Piñata? I think I used it as a daily toy photo a while back and never got around to blogging about it.


In any event, I had wanted to make a DC Animated version Brainiac Piñata for my first Superhero/villain birthday party, and had some idea, albeit vague, how I wanted to go about it. Obviously this meant a trip... TO THE INTERNET!

Pretty quickly I happened upon Brian Anderson's PinataBoy website, where I found great basic instructions, tips and inspiration. I just wrote to him directly for advice; I had several questions and he answered them all with haste and great detail!

For example, he gave me a great method for building the tentacles, which I adapted to create a thicker tentacle (I used three long balloons of different lengths, so that it would taper off at the end to one balloon width). Here's his step-by-step for a basic, one-balloon tentacle:
Here's how I would make a tentacle:
1) Blow up a long balloon.
2) Tear newspaper into long strips that are about 2" wide. (I use a paper cutter to get even strips).
3) Starting at one end of the balloon, wrap the long newspaper strips in a spiral pattern around the balloon, taping the newspaper pieces off occasionally with masking tape (but don't tape them to the balloon, only to other newspaper). Don't wrap them too loose or too tight, because you're going to bend the balloon and you don't want the newspaper strips to tear off.
4) When the balloon is fully wrapped, bend it into the shape you want and use a long stretch of masking tape to hold it in place. For example, if you bent the balloon into a U-shape, you would use a long piece of masking tape going from one end of the balloon to the other across the top of the U. You would make an S-shape similarly: make a small U-bend with one arm much longer than the other, then tape the short end to the "body" of the S. Then make a second U-bend in the long arm and tape the other end to the body of the S.
5) The newspaper wrapping will tear and form gaps when you bend the balloon around, so patch these up.
6) Cover with papier-mache and let dry. You'll probably need two layers before it will hold its shape.
7) Cut off the masking tape and use papier-mache to smooth out the spot where the tape was attached.

Now you have a rounded-end tentacle. This method can be used to make bends in two dimensions (so the tentacle would lie flat like an S on the ground). If you want a tentacle that bends in three dimensions (like the Medusa's hair), make one bend and stiffen that with papier-mache, and then make the second bend after the first one is dry. Play with this a little and you'll quickly see how to make sharper bends or more gradual curves.
The other thing he helped me with was the body itself. I originally tried to find a large weather or punch balloon locally but couldn't find anything that worked, and didn't have time to order one before my party. I think thought of making a geodesic framework of straws and laying hexagon card stock over top of it, but shortly into the construction I realized it wasn't going to work. However, Brian came through again with the following punch-balloon shopping lore:
"...the good news is that there are two different sizes of punch balls, and you've just got the wrong size.

There are two different kinds of balloons that are both called "punch balls." One of them blows up much larger than the other. The kind that blows up large (about 3 foot diameter) has an opening that looks like a regular balloon, with a rounded lip around it, and it's always sold with a big yellow rubber band attached to it. I have attached a picture called Buy-One-Like-This:


The kind of punch ball that blows up small just has a "straight pipe" opening with no lip around it. A picture of that kind is attached as Not-Like-This. (I'm guessing that's what you've got right now.)


You can probably find both kinds at Party City, but I know I've seen the larger kind at Target. The larger punch balls come in solid colors (red, blue, yellow, and green), whereas the smaller ones are usually multi-colored as in the attached jpg."
For figuring out the size of hexagons I'd need, there's a shockingly large number of geodesic dome calculators out there on the web. I don't remember the exact one I used, but here's a few. Find one that lets you adjust the number of sides of your panels.

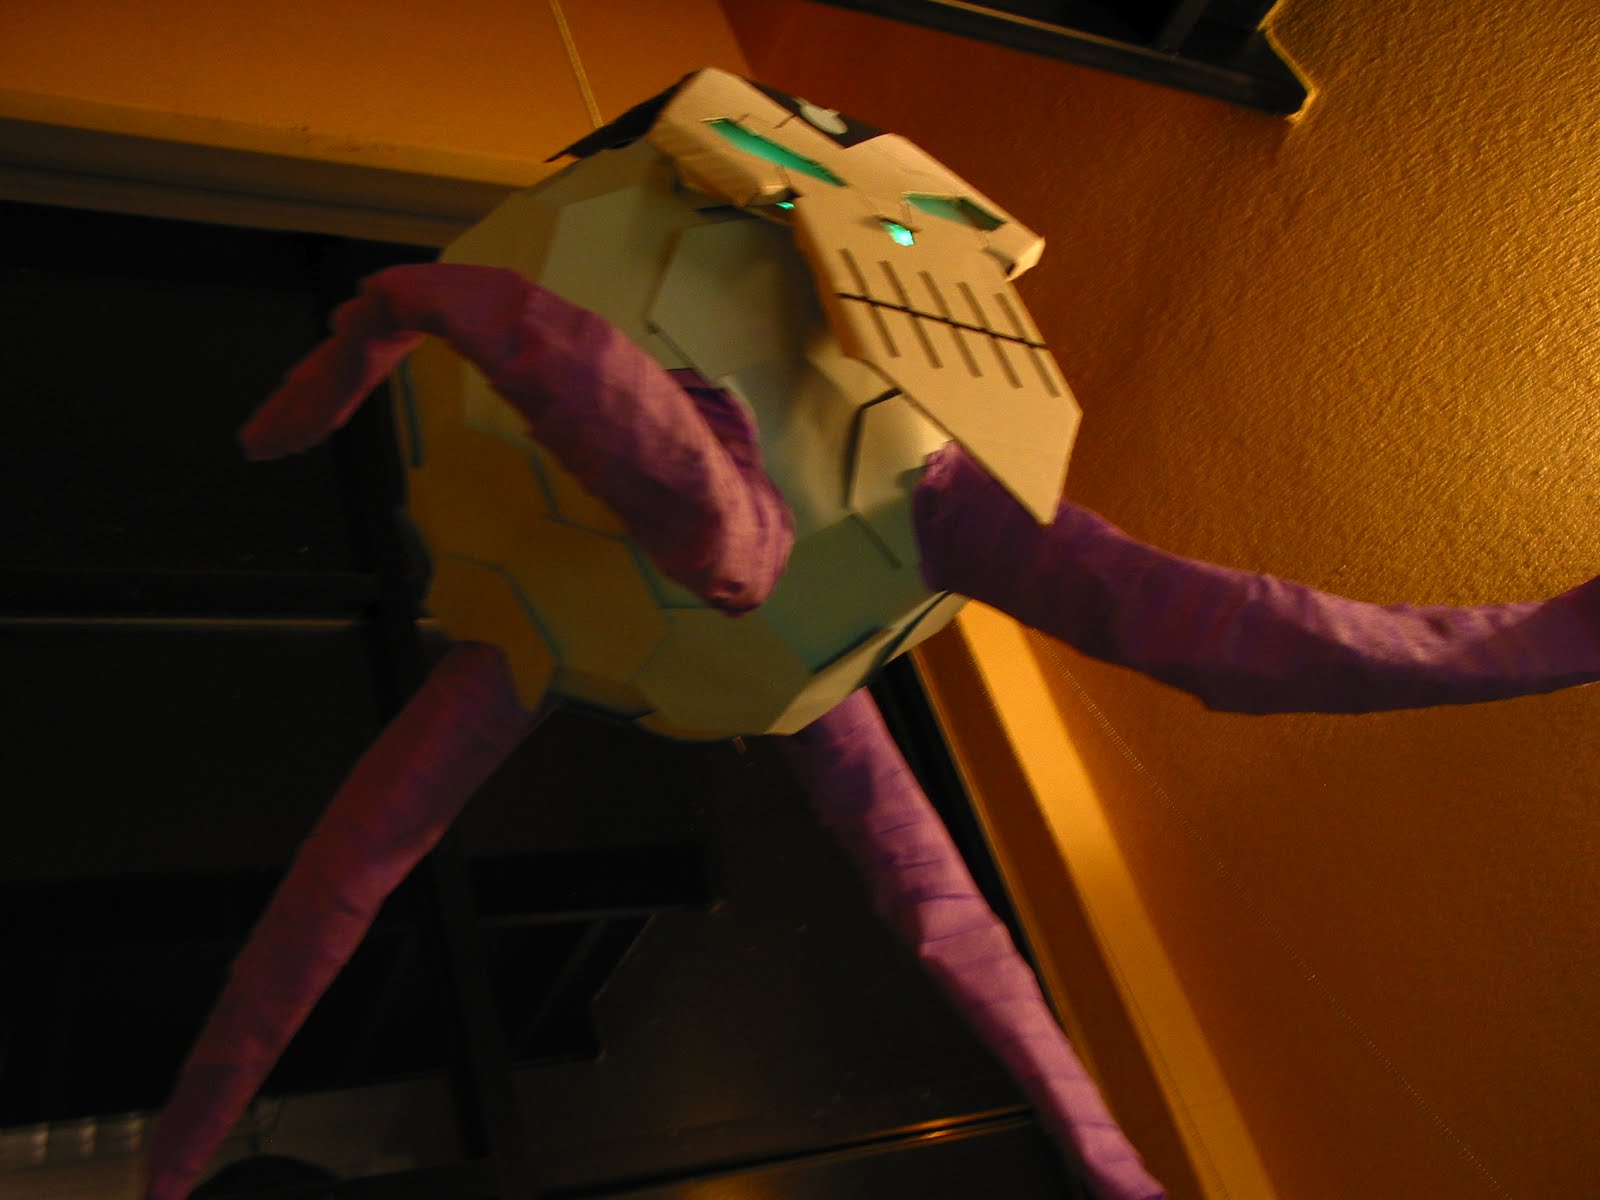
After everything was dry, I traced the tentacle ends on the base and cut holes out for them, and cut flower-petal flaps in the ends of the tentacles to fold them out and hot glue them to the body. I was able to skip the second-layer and papier-mache smoothing steps as I just wrapped the tentacles with purple-crepe paper streamers. I then hot-glued the blue cardstock hexagons I had cut out around the surface, cutting a few custom ones to fit around the tentacles.

The face was made from a single piece of filing box cardboard, cut to the shape of Brainiac's DC animated face and decorated with Sharpie. I glued piece of white paper behind the eyes and a black construction paper/blue cardstock Brainiac forehead-symbol on the top. The candy hole was behind the face plate.

I inserted a wire hanger from the inside through the top, which also served to stabilize the body, twisted close the hoop up top for hanging, filled him with candy, sealed it all up and done! All that remained was to break two green glow-sticks and tape (shoulda used glue) them on the eye shelves to complete the look!


We used a light saber to hit the thing :) Candy and toys for all!


Sunday, March 11, 2012

Capital One Credit Card SKETCHY

Capital One is a tremendously sketchy credit card company. For the over 10 years I had my Sony Card with JP Morgan Chase I never once was late on a payment because I was able to easily enroll in automatic balance payment online.

When Capital One acquired the Sony Card from Chase, I actually had a negative balance on the account. They mailed me back my negative balance rather than applying it to new charges (it would have more than covered the balance), and then proceeded to charge me late fees on the new charges since I was no longer enrolled in automatic payment. When I called them to straighten this out, they told me they would send me both my new card and paperwork to enroll in automated payments. I didn't receive my card for weeks and the automatic payment paperwork NEVER came.

You can't even enroll in automatic payments online, you have to fill out the physical paperwork - an obvious hurdle they've installed to get people to miss payments.

When I called today to tell them again I'd been charged multiple late fees on a stray $15 webhosting charge that was still set to this card (I try never to use it anymore because of Capital One's sketchiness), they said they could do nothing about waiving the late fees and that there was no record of me requesting paperwork, because they don't keep records past six months. No customer service records past SIX MONTHS?!? REALLY?!? Are the 5kb of space that information would take up in their database that valuable that they have to purge the system several times a year? Complete and utter nonsense.

I asked them to mail it again and for a confirmation number I could associate with this call, and he said they don't provide confirmation numbers for this sort of call. But he said he could mark it in the account. Which, of course, they'll then just erase in a few months.

SKETCHY.

Tuesday, March 6, 2012

KHAAAAAAANN!

Hey all, I thought I'd share the results and how to make the "Star Trek: Wrath of Khan" Khan Noonien Singh outfit I made for my costume birthday party this past weekend!


The build took about four days the week leading up to the party, with a lot of shopping around for bits and pieces in the few weeks beforehand. Finding the right fabric, and cheaply, was the most time-consuming part of this project - if money is no object, I'm sure someone could make this much more quickly; the whole thing cost me under $45.

- Wig is a pale blonde mullet wig: Couldn't find a platinum or grey one, unfortunately, but this one had the shape and was close enough. In the movie's opening scenes, his hair has a slightly blonde tint to it, so I was fine with it. In the future, I might find some way to dye synthetic wig material.

- Tunic is made from scratch from a dark orange polar fleece, with a little padding in the quilted collar: I traced fabric panel patterns from a regular button-down, slim-fitting shirt of mine, leaving about an inch of extra space on the edge and changing the edge on the front panels to account for the double-breasted front and to show the massive amount of Khan/Montlebahn cleavage necessary. I also added a very large and wide piece of equilateral trapezoid-shaped fabric at the neck of the back panel, which I rolled with some padding, tapered at each end, to create the collar. I rolled the padding down to double-width of the final collar, quilted the collar sections in 1.5" widths, and then folded it under itself and attached the sides of the collar to the two front panels, after I had assembled the tunic.

The extra padded detail is created by cutting a piece of fabric in the shape and then rolling pieces of fleece and fixing them with glue to create the quilting. Make the rolls twice as long as the width of the fabric and, after affixing, wrap the ends around to the back to create a closed quilt. No padding is necessary, as the fabric acts as it's own padding at this size. Then simply sew the accessories onto the main tunic, or wrap to make cuffs. The tunic lines are just long strips of fabric hot glued to the tunic.

The fleece was a blessing on several levels. It's incredibly easy to work with; it lets you easily manipulate and shape it around the curves of the collar and when folding/padding the collar itself. It is also very comfortable and warm, despite being full of holes and missing an arm; while some of my party guests were chilly (my apartment can get cold), I was quite toasty.

- Necklace is phone wire, washers, electrical tape, hot glue, cardboard and paint: I didn't have the time or money to order the Starfleet belt buckle or necessary authentic electrical fittings (ferrite rings, eight pin octal tube socket, euro 4 pin din, etc...) so I just cobbled it together by stripping old phone wire and wrapping it around three washers of various sizes, and cutting, taping and painting cardboard for the buckle.

- Belt and Buckle is silver poster board and brown pleather: The buckle still needs to be aged/weathered/sealed, but it's just silver posterboard/light bounce card cut to look like the prop. I got it from B&H, our local photo/video store, but I'm sure art supply houses would have it.

- Wrist Device is stripped ethernet cable, brown pleather, silver poster board, velcro and hot glue: Last minute addition to the costume, I cut out a wrist band from the pleather I had, cut a rectangle of silver poster board, cut two slits in the short ends and threaded the pleather through. Then I simply partially stripped an ethernet cable and hot-glued the plug end onto the poster board, along with some other electronics looking thingies. TIP: When cutting the ethernet cable, leave some of the casing intact; you can then divide this into adjustable cable holders that you can slide up and down the length of the exposed wires to keep them together. Then I just stuck a piece of self-adhesive velcro as a clasp.

- Glove is black leather hot glued with black and metallic fabric: Just a spare, black leather winter glove I had lying around and it happened to be the right hand. I lucked out on finding a fabric with metallic triplets running along it to simulate the metallic beading on the actual prop. (I also got more to make Khan's Ceti Alpha V desert mask, but ran out of time.)

- Chest Sash is a brown leather belt, key rings, stripped ethernet cable and hot glue: This is just a 99-cent store belt with partially stripped cable threaded through the holes and key rings threaded through the wires. The wire is glued down by the outer casing to the belt on the back, so you can still adjust the wires for size. This is not a photo accurate prop, but it worked well enough for the party. You could easily use these same materials to do the build properly by flipping the belt so the buckle's on top, cutting away the rectangular buckle and replacing it with a half circle ring from a shoulder bag or purse, embedding a ring, etc... I simply had time constraints.

"Who has my copy of MOBY DICK?!!"

Final budget broke down to this, approximately:
Orange fleece, 2 yards: $16
Mullet wig: $10 (including shipping)
Silver light bounce poster board: $7
Brown pleather, 1 yard: $5
Hot glue: $4
Key rings: $0.99
Washers: $0.99
Belt: $0.99
Black and metallic material, 1 yard: $0.99
Glove, wiring, velcro, padding, cardboard, paint and other miscellany were free, scavenged or on hand. Dark brown pants are from Old Navy, but could be from any, old thrift shop.